How to Create Your First Web Scraper with Scrapy: A Step-by-Step Tutorial
Bonus: let's play with proxies with advanced-scrapy-proxies
This post is sponsored by Oxylabs, your premium proxy provider. Sponsorships help keep The Web Scraping Free and it’s a way to give back to the readers some value.
In this case, for all The Web Scraping Club Readers, using the discount code WSC25 you can save 25% OFF for your residential proxies buying.
If you’re reading this newsletter, I suppose you know already what’s Scrapy. But if you don’t, let me tell you that Scrapy is a comprehensive and powerful open-source web scraping framework written in Python. It is designed to simplify the process of extracting data from websites by providing a flexible and efficient platform for developers and data enthusiasts alike. Using Scrapy, you can effortlessly navigate through web pages, extract desired information, and store it in a structured format for further analysis and use, like JSON, CSV, and so on.
Whether you're a data scientist, researcher, or developer, Scrapy offers a great variety of features and functionalities that make web scraping a breeze. Its asynchronous and non-blocking architecture allows for speedy and concurrent scraping, enabling you to collect vast amounts of data in a relatively short amount of time. Additionally, Scrapy's built-in support for handling common web scraping challenges like handling pagination, managing cookies and sessions, and rotating user agents makes it a go-to choice for various scraping projects.
You can even render pages with Javascript inside, adding a package called Splash, a headless browser always maintained by the same team. Unluckily it won’t help against the most sophisticated anti-bots, but Scrapy for me is the number one choice for websites with no anti-bot.
In this tutorial, we will guide you through the process of creating your first web scraper using Scrapy. We'll cover everything from installing Scrapy, creating a new project, defining and navigating through web pages, extracting data, and storing it in a structured format. By the end of this tutorial, you'll have a solid foundation for building more complex and customized web scrapers to suit your specific data extraction needs.
Scrapy Framework Architecture
Scrapy is built on a robust and flexible architecture designed to efficiently handle the complexities of web scraping tasks. Understanding its architecture is essential for building effective and scalable web scrapers, let’s have a look at it starting from this picture extracted from the original architecture documentation page.
At the core of Scrapy's architecture are its spiders. Spiders are user-defined classes that define how to navigate websites, where to extract data, and how to process the extracted information. Each spider represents a specific website or a group of websites to be scraped. When a spider is executed, Scrapy sends requests to the specified URLs and processes the responses.
Scrapy uses an engine to coordinate the execution of spiders. The engine schedules requests, handles their priorities, and manages the spider's state throughout the scraping process. It also ensures that the scraping process is carried out in an efficient and non-blocking manner.
To fetch web pages and handle HTTP requests and responses, Scrapy uses a powerful and asynchronous networking library called Twisted. Twisted allows Scrapy to manage multiple requests concurrently, making the scraping process faster.
During the scraping process, Scrapy utilizes a series of components called middlewares. Middlewares are like processing pipelines that can modify requests and responses before they reach the spiders and after they leave the spiders. They are useful for tasks such as user-agent rotation, proxy handling, and error handling.
Scrapy stores the extracted data in Items. An Item is a simple container used to collect and structure the scraped data. It acts as a Python dictionary with key-value pairs, where keys represent the fields of the extracted data, and values hold the corresponding values.
Once the data is extracted and processed, Scrapy offers several built-in options to store the results. You can save the data in various formats, including JSON, CSV, XML, or even directly in databases like SQLite or MongoDB.
Creating our first scraper in 6 easy steps
Step 1: Installing Scrapy
Before we begin, ensure you have Python and Pip installed on your system. You can download Python from the official website (https://www.python.org/downloads/) if you haven't already.
To install Scrapy, open your terminal or command prompt and run the following command:
pip install scrapyScrapy is now installed on your system, and we're ready to create our first web scraper!
Step 2: Creating a New Scrapy Project
Let's create a new Scrapy project for our web scraper, we’ll use the test website quotes.toscrape.com as a target one:
Open your terminal or command prompt, navigate to your desired directory, and run the following command:
scrapy startproject quotesThis command creates a new directory called quotes, which contains the basic structure of a Scrapy project.
Step 3: Defining the Spider
In Scrapy, a "spider" is the script that defines how to navigate the website and extract data. It is the core component responsible for web scraping. Let's create a spider for our web scraper:
Navigate to the project directory:
cd quotesNow, create a new spider named first_spider using the following command:
scrapy genspider first_spider toscrape.comAfter executing the above command, you'll find a new file named first_spider.py in the quotes/spiders directory.
Step 4: Configuring the Spider
Open the first_spider.py file using a text editor or an Integrated Development Environment (IDE) of your choice.
In this file, you'll see a skeleton structure of the spider. The most important methods to focus on are:
start_requests(): This method generates the initial requests to start scraping. You can specify the URLs you want to scrape here.parse(): This method is called with the response of each request made bystart_requests(). It handles the parsing of the HTML and extraction of data.
import scrapy


class FirstSpiderSpider(scrapy.Spider):
    name = 'first_spider'
    allowed_domains = ['toscrape.com']
    start_urls = ['https://quotes.toscrape.com/']

    def parse(self, response):
        pass
Now it’s time to define the output data model.
Let’s keep it simple and extract only quotes and authors from the target website.
So first we’re gonna define the item structure, which basically describes the fields we’re gonna pass as an output of the scraper.
Our items.py file will look like the following:
import scrapy


class QuotesItem(scrapy.Item):
    # define the fields for your item here like:
    # name = scrapy.Field()
    quote = scrapy.Field()
    author = scrapy.Field()
    pass
In 99% of cases, in the items.py file, you’ll only list the output fields without any additional operations, but you can read on the Scrapy documentation of all the possible configurations.
Now we need to map the HTML elements inside the code of the page to our item’s fields. To do so, we’ll use the so-called selectors. We have seen some time ago the differences between XPATH selectors and CSS ones.
We’ll use the XPATH selectors for this example, as I find them clearer and more flexible.
First, we need the list of items containing the quotes and authors, which we’ll iterate in a second step.
import scrapy
from quotes.items import *

class FirstSpiderSpider(scrapy.Spider):
	name = 'first_spider'
	allowed_domains = ['toscrape.com']
	start_urls = ['https://quotes.toscrape.com/']

	def parse(self, response):
		quote_list = response.xpath('//div[@class="quote"]')
And now we iterate through the quote_list to get the Author and Quote for every single item.
		for single_quote in quote_list:
			quote= single_quote.xpath('.//span[@itemprop="text"]/text()').extract()[0]
			author = single_quote.xpath('.//small[@itemprop="author"]/text()').extract()[0]
			item = QuotesItem(
				quote=quote,
				author=author
				)
			yield item
You may have noticed that I’m using the shortest selector possible: this is to reduce the chances that the selector would result outdated or broken at every small change of the website.
Last but not least, we want to keep crawling the website until we have read all the pages.
So, after we’ve scraped all the items, we’ll use another selector to detect the “next page” URL and we’ll make a request on it. With the call_back parameter, we’re telling the scraper that, after the request gets the response, this must be parsed using again the parse function. Doing so, we’re creating a loop we’ll exit from only when there won’t be any selector for the next page.
We’re importing the Scrapy Request module and implementing the pagination.
from scrapy.http import Request
...
		try:
			next_page= response.xpath('//li[@class="next"]/a/@href').extract()[0]
			yield Request('https://quotes.toscrape.com'+next_page, callback=self.parse)
		except:
			print("No more pages")
All the code can be found in the GitHub repository of The Web Scraping Club accessible to every reader.
One final consideration, I’ve used the try/except clause since for the last page, the selector is not available and I don’t want my scraper to end with an error code.
Step 5: Running the Scraper
Now that we have defined our spider and data extraction logic, it's time to run our web scraper:
Open your terminal or command prompt, navigate to the project directory (quotes), and execute the following command:
scrapy crawl first_spider -o quotes.jsonThe command above instructs Scrapy to run the spider named first_spider and save the extracted data to a file named quotes.json.
Bonus Step: Adding a proxy
Of course, a proxy is not needed for this website, since it’s one made for testing purposes but let’s suppose we need one.
First, we need to install the advanced-scrapy-proxies package and then add the proxy middleware to our scrapy project.
pip install advanced-scrapy-proxiesIn our settings.py file, we add the package as a downloader middleware.
DOWNLOADER_MIDDLEWARES = {
    'scrapy.downloadermiddlewares.retry.RetryMiddleware': 90,
    'advanced-scrapy-proxies.RandomProxy': 100,
    'scrapy.downloadermiddlewares.httpproxy.HttpProxyMiddleware': 110
}
To use the proxy in our scraper, we’ll add some parameters to its launch.
scrapy crawl first_spider -o quotes.json -s PROXY_MODE=0 -s PROXY_LIST='proxy.txt' -s REMOTE_PROXY_USER='MYUSERNAME' -s REMOTE_PROXY_PWD='MYPASSWORD'It might seem complicated but let’s have a brief recap on how to use this package.
First of all, we need to select the Proxy Mode:
-1: NO_PROXY, middleware is configured but does nothing. Useful when needed to automate the selection of the mode
0: RANDOMIZE_PROXY_EVERY_REQUESTS, every request use a different proxy
1: RANDOMIZE_PROXY_ONCE, selects one proxy for the whole execution from the input list
2: SET_CUSTOM_PROXY, use the proxy specified with option CUSTOM_PROXY
3: REMOTE_PROXY_LIST, use the proxy list at the specified URL
For this test, we’re gonna use the Oxylabs Web Unblocker, it’s an overshoot but it’s just an example of integration of proxies in our Scrapy spiders.
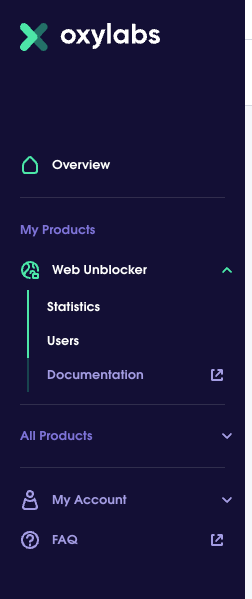
From the Oxylabs’ website, after the login, we have all the available products for our account on the left.
We change the password in the users’ menu and then we’re ready to go.
From the documentation, we can see that by calling the following URL
http://YOUR_USERNAME:YOUR_PASSWORD@unblock.oxylabs.io:60000
we have access to the unblocker proxy.
All we need to do then is create a proxy.txt file where we write literally the following string:
http://$USER:$PWD@unblock.oxylabs.io:60000
During the runtime, $ USER and $ PWD will be substituted with the real username and password passed in the REMOTE_PROXY_USER and REMOTE_PROXY_PWD parameters.
In this way, we could get a list of different types of proxies from a single provider and use them randomly by adding them to the proxy.txt list but without exposing the credentials.
Now we’re ready to launch the scraper again, this time using the Oxylabs Unblocker.
scrapy crawl first_spider -o quotes.json -s PROXY_MODE=0 -s PROXY_LIST='proxy.txt' -s REMOTE_PROXY_USER='MYUSERNAME' -s REMOTE_PROXY_PWD='MYPASSWORD'And again, of course, it works!
This concludes this brief tutorial on Scrapy, if you liked this format and want to see more of them, please comment with which tool you’d like to see covered, as always any feedback is welcome.


