Build a RAG Application with ScraperAPI, Gemini, and FAISS
Create your own web app in these simple steps
Build an interactive RAG application that scrapes website data with ScraperAPI, leverages Google's Gemini for intelligent query responses, and uses FAISS for fast, relevant product insights.
What if finding the perfect product was as simple as asking a question? Instead of endlessly scrolling through shopping websites, imagine scraping that website's data and directly querying it. Need a bag within a specific budget? Just ask. No more tedious clicking and page-hopping; with a simple prompt, the ideal item is instantly at your fingertips.
That's exactly what we'll build using Retrieval Augmented Generation (RAG). This article will guide you through building a RAG application that combines ScraperAPI's LLM output feature, Google's Gemini model, FAISS for efficient vector search and retrieval, and Streamlit for free cloud hosting.
Let's dive in.
Understanding Retrieval-Augmented Generation
Before we jump into code, let's understand how Retrieval-Augmented Generation (RAG) powers this entire system.
Retrieval-augmented generation is a technique that enhances the capabilities of a large language model (LLM) by enabling it to access, retrieve, and incorporate knowledge from external sources to enrich its response generation.
Almost every popular Generative AI Chatbot, such as ChatGPT, Gemini, Llama, etc., uses RAG functionality to give users up-to-date information on queries.
RAG not only improves the accuracy of an LLM's response but also grounds the model in relevant data through vector similarity search to avoid hallucinations–a case whereby the model invents inaccurate answers and relays them confidently as factual.
Below are the three core stages that govern every RAG application:
Retrieval
Rather than relying solely on its pre-trained knowledge base, the LLM accesses data from relevant external sources during retrieval and extracts information pertinent to the user’s query. This information is then broken into text chunks and further processed through a similarity search. The retrieval process follows this pattern:
Query Input: The user submits a query that outlines what they need.
External Source Search: The LLM accesses external databases, websites, or other sources to retrieve content relevant to the query.
Content Extraction and Segmentation: The retrieved data is parsed and divided into text chunks, making it easier to process.
Embedding Generation: It then converts each text chunk into embeddings (vector representations) that capture their semantic meaning.
Similarity Search: It employs a vector database like Pinecone or a vector store like FAISS to index the embeddings and perform a similarity search, identifying the text chunks that best match the user’s query.
Augmentation
The augmentation stage bridges the gap between retrieving external data and generating a final response. This process involves crafting a new input prompt for the LLM by directly integrating the retrieved context from the embeddings into the prompt. The components of the augmentation stage are as follows:
Retrieval Input: Utilizes the text chunks based on semantic similarity from the retrieval stage.
User Query: Includes the original user query and any previous conversation history.
Prompt Construction: Combines these elements into a concise prompt, usually including the context, user question, and chat history.
Concatenation: Joins the text chunks to form a context section, arranging them by relevance, recency, or other criteria.
Instructional Guidance: Adds explicit instructions to guide the model's response.
Generation
This is the output stage, where the LLM produces a contextually relevant response using the processed data and augmented prompt. Without RAG, the LLM generates responses solely from its pre-trained knowledge base, which lacks real-time information. Because training LLMs on massive datasets makes instantaneous updates computationally expensive, these models can only be refreshed periodically. In contrast, RAG grounds the model with real-time information while fully leveraging its innate ability to generate human-like text.
ScraperAPI’s LLM Output Feature
By default, web scraping tools return data in formats like HTML, JSON, CSV, etc. The problem is that parsing this data to an LLM requires further cleaning and formatting, which costs time and resources and increases latency to refine that data to natural text, which is easier for LLMs to understand.
ScraperAPI’s LLM Output Feature eliminates the need to figure out a site's HTML structure, write custom code to remove HTML tags and JavaScript attributes, or rely on external libraries to parse the data. Instead, it delivers the scraped data in a clean markdown format.
To further elaborate, here are some of the benefits of using the LLM Output Feature from ScraperAPI:
Reduced Noise: Web pages contain lots of HTML, JavaScript, and other irrelevant elements for data extraction. ScraperAPI’s output_format parameter filters out this noise and allows the LLM to focus on the core content.
Time and Resource Savings: Data cleaning is time-consuming. By having ScraperAPI handle the initial formatting, you’ll reduce the post-processing time you will otherwise spend getting the data ready for the LLM to query.
Improved Data Quality: Remove unnecessary web content markup, improving your datasets' accuracy and consistency.
LLM data preparation: ScraperAPI documentation states this feature helps prepare data for training Large Language Models.
Building web scrapers for clients? Earn commissions by integrating ScraperAPI into their projects and referring new paying users.
Getting Started with ScraperAPI
To begin, go to ScraperAPI’s website.
You can either log in if you have an account already or click on "Start Trial” and create one:
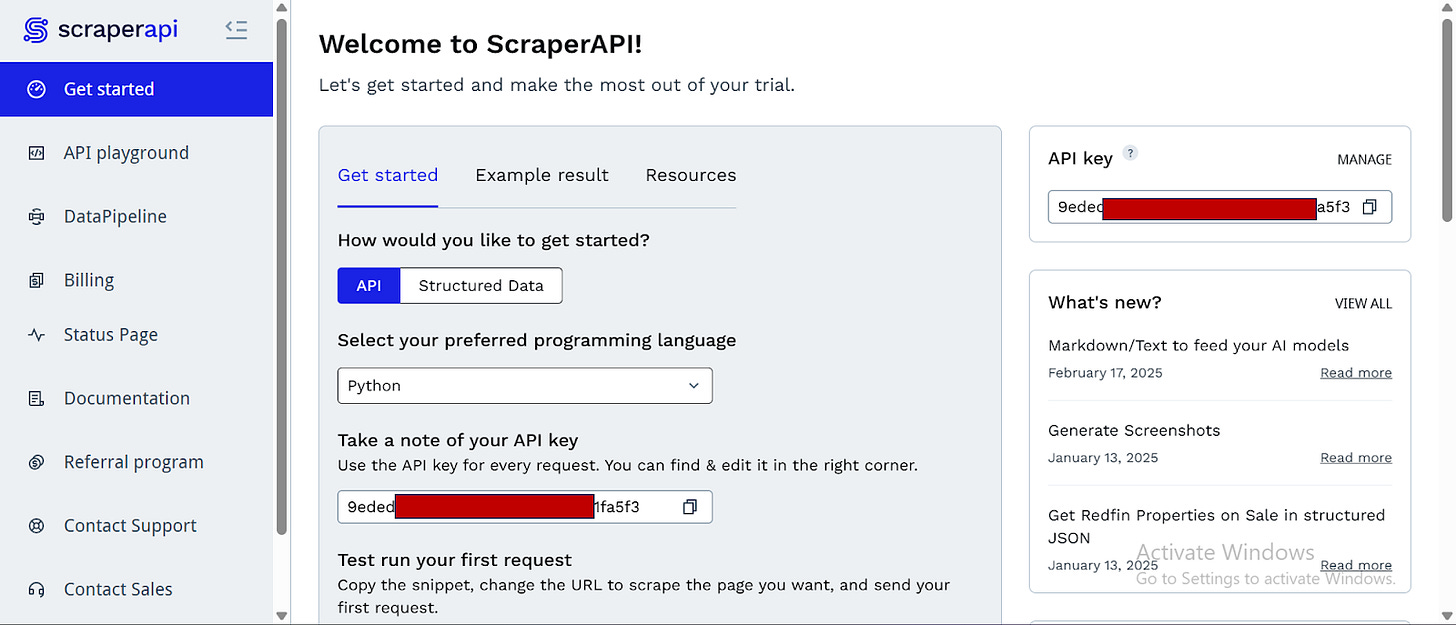
After creating your account, you’ll see a dashboard providing you with an API key, access to 5000 API credits (7 days limited trial period), and information on how to get started scraping. No credit card information is needed.
Scroll down and click on “Upgrade to Larger Plan” to access more API credits and advanced features.
While on the dashboard page, select “Resources”:
Click on the “Go to documentation” link under any of the categories below:
It will open up the documentation page.
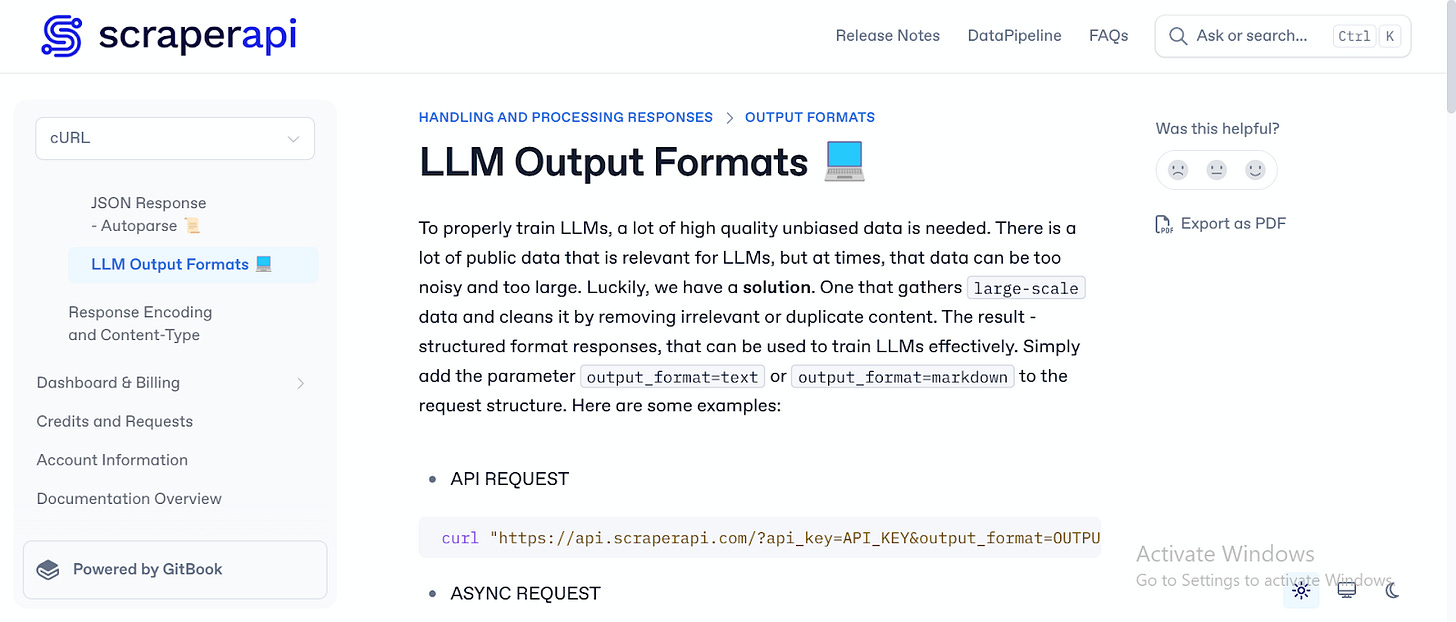
Locate the search bar on the right corner and search for "LLM Output Format.”
You’ll be directed to ScraperAPI’s detailed and clear documentation on using the LLM Output Feature to make web scraping requests.
The documentation provides quick information on how to get started making requests with the LLM Output Feature and a sample of what to expect. We will go into further details in the code section of this article.
Building web scrapers for clients? Earn commissions by integrating ScraperAPI into their projects and referring new paying users.
Building the RAG Application
Step 1: Setting Up the Project
Create a new project folder in a virtual environment and install the necessary dependencies.
Create the project folder:
mkdir RAG_project
cd RAG_project
2. Set up a virtual environment:
python -m venv venvActivate the environment:
Windows:
venv\Scripts\activatemacOS/Linux:
source venv/bin/activate3. Install Dependencies:
pip install streamlit requests google-generativeai langchain langchain_community sentence-transformers faiss-cpuThe key dependencies are:
streamlit: For building the app’s UI.
requests: Allows the application to make HTTP requests and interact with ScraperAPI.
google-generativeai: Enables Google's Gemini for generating responses based on scraped content.
Langchain and langchain_community: Provide tools for text processing, document handling, and vector database management, facilitating semantic search capabilities.
sentence-transformers: Used for generating dense vector embeddings of text, enabling semantic similarity comparisons.
faiss-cpu: Provides efficient similarity search and clustering of dense vectors; we’re using it here to build and query the vector store.
4. Define the Project Structure:
RAG_project/
│── ai_scraperapi.py
Step 2: Enabling Google’s Gemini LLM
I’ll be using the gemini-1.5-flash as the LLM in this project; here are the steps to guide you in doing the same:
Go to the Google Developer API website.
Create a Google account if you do not have one already.
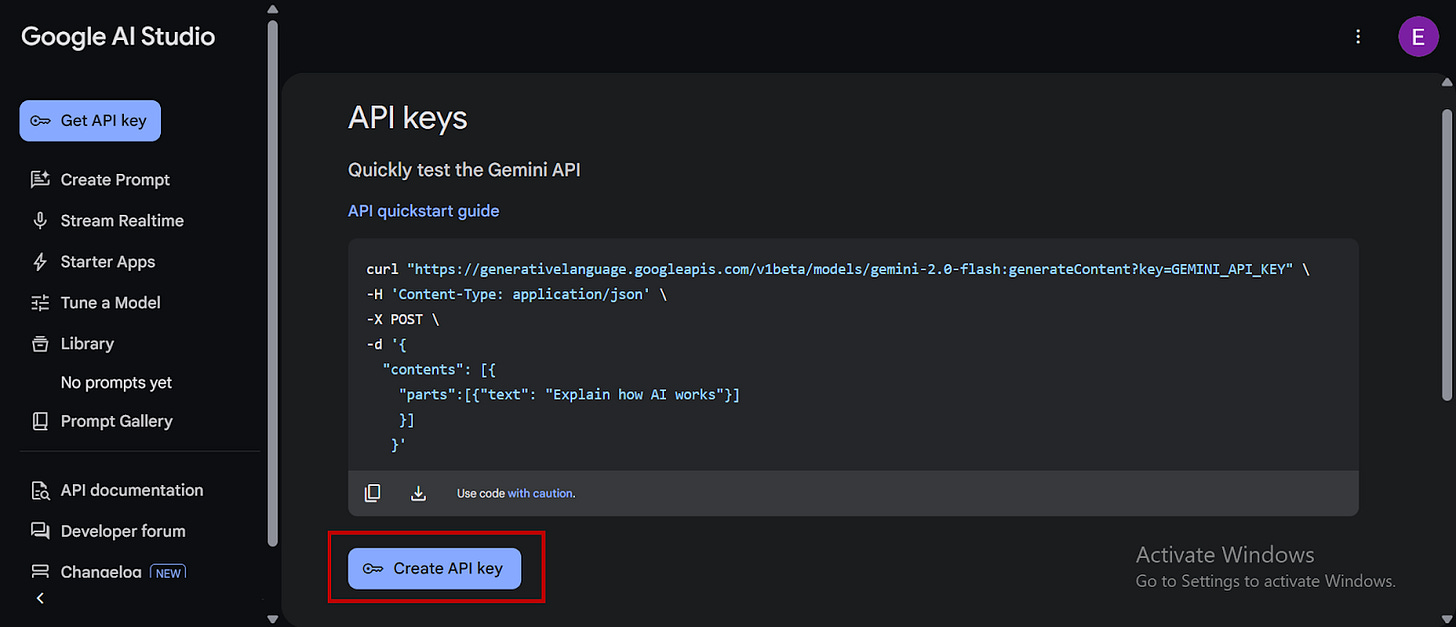
Click on “Get a Gemini API Key”:
You’ll be redirected to Google AI Studio, select “Create an API Key," copy your API key, and store it as an environment variable:
Step 3: Building the Code Base
Now, it’s time to start building the code base and writing a suitable prompt to guide the LLM for its job.
1. Importing Libraries and Setting Up API Keys
First, the application imports necessary libraries from installed dependencies and configures the Gemini API.
import streamlit as st
import requests
import google.generativeai as genai
import os
from langchain.text_splitter import RecursiveCharacterTextSplitter
from sentence_transformers import SentenceTransformer
from langchain_community.vectorstores import FAISS
from langchain.docstore.document import Document
from langchain_core.embeddings import Embeddings # Correct import for Embeddings

# Replace with your actual API keys for testing
GOOGLE_API_KEY = "AIxxxxxxxxxxxxxx"
SCRAPERAPI_KEY = "9edxxxxxxxxxxxxx"

# Configure Gemini API
genai.configure(api_key=GOOGLE_API_KEY)
The code above achieves the following:
Imports:
streamlit: Builds the web app's user interface.
requests: Enables HTTP requests to interact with the ScraperAPI for web scraping
google.generativeai: Integrates Google’s Gemini LLM for language generation capabilities.
langchain.text_splitter: Splits scraped text into manageable chunks.
sentence_transformers: Generates sentence embeddings for semantic search.
langchain_community.vectorstores.FAISS: Creates and manages a vector database for efficient similarity searches.
langchain.docstore.document.Document: Handles document objects.
langchain_core.embeddings.Embeddings: Defines the embedding interface.
API Key Setup: The code sets up the API keys needed for Google Gemini and ScraperAPI, allowing the application to authenticate and use these services.
Gemini Configuration: genai.configure(api_key=GOOGLE_API_KEY) configures the Google generative ai library to use the provided API key, enabling Gemini.
2. Setting Up Sentence Embeddings
To enable semantic search—which focuses on understanding the meaning and intent behind words—the application creates a custom embedding wrapper using the SentenceTransformer model. This embedding wrapper converts text into a format the application can use for semantic similarity search in the vector store. Utilizing Sentence Transformers ensures the application can understand the context of the scraped text and a user’s query for more relevant and accurate search results.
# embedding wrapper for SentenceTransformer
class SentenceTransformerEmbeddings(Embeddings):
    def __init__(self, model):
        self.model = model

    def embed_documents(self, texts):
        return self.model.encode(texts).tolist()

    def embed_query(self, text):
        return self.model.encode(text).tolist()
Here is a summary of what the code above achieves:
Custom Embedding Class: It defines a class SentenceTransformerEmbeddings that inherits from langchain_core.embeddings.Embeddings. This class acts as a wrapper, allowing the SentenceTransformer model to be used with LangChain's vector store functionality.
Initialization: The __init__ method initializes the class with a pre-trained SentenceTransformer model. This model is what is used to generate embeddings.
embed_documents Method: This method takes a list of text strings (texts) as input. It uses the SentenceTransformer model's encode method to convert each text string into a numerical vector representation (embedding). It returns a list of embeddings.
embed_query Method: This method takes a single text string (text) as input, representing a search query. It also uses the SentenceTransformer model's encode method to convert the query into a numerical vector representation and returns the resulting embedding.
3. Web Scraping and Formatting
This is where ScraperAPI’s LLM Output feature excels. The application sends a single request to ScraperAPI to scrape the target URL, simultaneously retrieving and preparing the website content while formatting the output in markdown for further analysis.
def scrape_and_format(url, scraperapi_key, output_format="markdown"):
    """Scrapes a website using ScraperAPI and returns the output in markdown format."""
    try:
        payload = {
            'api_key': scraperapi_key,
            'url': url,
            'render': “true”,
            'output_format': output_format,
        }
        response = requests.get('http://api.scraperapi.com/', params=payload)
        response.raise_for_status()
        return response.text
    except requests.exceptions.RequestException as e:
        return f"Error during scraping: {e}"
How the function works:
scrape_and_format Function: This function encapsulates the entire process of scraping the website and formatting its output as markdown. It takes the target url, the scraperapi_key, and an optional output_format parameter (defaulting to "markdown").
ScraperAPI Payload: It then constructs the ScraperAPI payload as a dictionary, including api_key for authentication, the target website's url, render: “true” to capture dynamic content, and output_format to specify markdown or text output.
HTTP Request: Here, it uses the requests.get method to send a GET request to the ScraperAPI endpoint with the constructed payload.
Error Handling: response.raise_for_status() will raise an HTTPError if the HTTP request returns an unsuccessful status code. A try...except block handles potential requests. exceptions.RequestException errors during the HTTP request. If an error occurs, it returns a message.
Output: If the request is successful, the function returns the scraped website content as a string, formatted according to the output_format parameter, which is Markdown.
4. Generating Responses with Gemini
The app uses Gemini and semantic search to generate intelligent responses based on the scraped website data and the user's query.
def generate_gemini_response(model, prompt, vector_store, chat_history):
    """
    Retrieves the most relevant document chunks from the vector store,
    builds an augmented prompt using the retrieved context and chat history,
    and generates a Gemini response.
    """
    try:
        relevant_docs = vector_store.similarity_search(prompt)
        context = "\n".join([doc.page_content for doc in relevant_docs])
        augmented_prompt = (
            f"Context:\n{context}\n\n"
            f"User Question: {prompt}\n\n"
            f"Chat History:\n" + "\n".join(chat_history)
        )
        response = model.generate_content(augmented_prompt)
        return response.text
    except Exception as e:
        return f"Error generating response: {e}"
The code above achieves the following:
generate_gemini_response Function: Triggers the process of retrieving relevant information, constructing a prompt, and generating a response using Gemini. It takes the Gemini model instance, the user's prompt, the vector_store for semantic search, and the chat_history as input. The application stores the scraped data within the chat history.
Semantic Search: relevant_docs = vector_store.similarity_search(prompt) performs a similarity search in the vector store using the user's prompt. This action retrieves the most relevant document chunks based on semantic similarity.
Context Aggregation: context = "\n".join([doc.page_content for doc in relevant_docs]) extracts the text content from the document chunks and joins them into a single string, creating the context for the LLM (Gemini).
Prompt Augmentation: An augmented_prompt combines the retrieved context, the user's question, and the chat history.
Gemini Response Generation: response = model.generate_content(augmented_prompt) sends the augmented prompt to Gemini, which generates a response.
Error Handling: A try...except block catches potential exceptions during the response generation process. If an error occurs, an error message will return.
Output: If the response generation is successful, the function returns the generated response as a string.
5. Building the UI with Streamlit
To create the UI for the application, this section of the code contains a main function that orchestrates the entire process, including user input, web scraping, data processing, and response generation.
def main():
    st.title("Scrape Bot")

    target_url = st.text_input("Enter the website URL (e.g., https://www.gucci.com):")

    if target_url:
        with st.spinner("Scraping and processing website..."):
            scraped_data = scrape_and_format(target_url, SCRAPERAPI_KEY, output_format="markdown")

        if "Error" in scraped_data:
            st.error(scraped_data)
            return

        text_splitter = RecursiveCharacterTextSplitter(chunk_size=1000, chunk_overlap=200)
        text_chunks = text_splitter.split_text(scraped_data)

        documents = [Document(page_content=chunk) for chunk in text_chunks]

        model_st = SentenceTransformer('all-mpnet-base-v2')
        embedding_wrapper = SentenceTransformerEmbeddings(model_st)

        vector_store = FAISS.from_documents(documents, embedding_wrapper)

        model = genai.GenerativeModel('gemini-1.5-flash')
        if 'chat_history' not in st.session_state:
            st.session_state['chat_history'] = []

        user_input = st.text_input("Ask a question about the website data:")

        if user_input:
            with st.spinner("Generating response..."):
                response = generate_gemini_response(model, user_input, vector_store, st.session_state['chat_history'])
                st.session_state['chat_history'].append(f"User: {user_input}")
                st.session_state['chat_history'].append(f"Gemini: {response}")
                st.markdown(response)

if __name__ == "__main__":
    main()
The code above achieves the following:
Streamlit UI Setup: st.title("Scrape Bot with Semantic Search") sets the title of the RAG application and target_url = st.text_input(...) creates a text input field for the user to enter a target website URL.
Web Scraping and Processing: After the user enters a URL, the app scrapes and formats the site content, displaying a loading spinner during processing. The app calls scrape_and_format to retrieve and format content, checks for scraping errors, splits the data into text chunks using RecursiveCharacterTextSplitter, creates LangChain document objects, loads the Sentence Transformer model, creates an embedding wrapper, builds a FAISS vector store, initializes the Gemini model, and sets up the chat history in the Streamlit session state.
Execution: if __name__ == "__main__": main() ensures that the main function executes properly when the script is run.
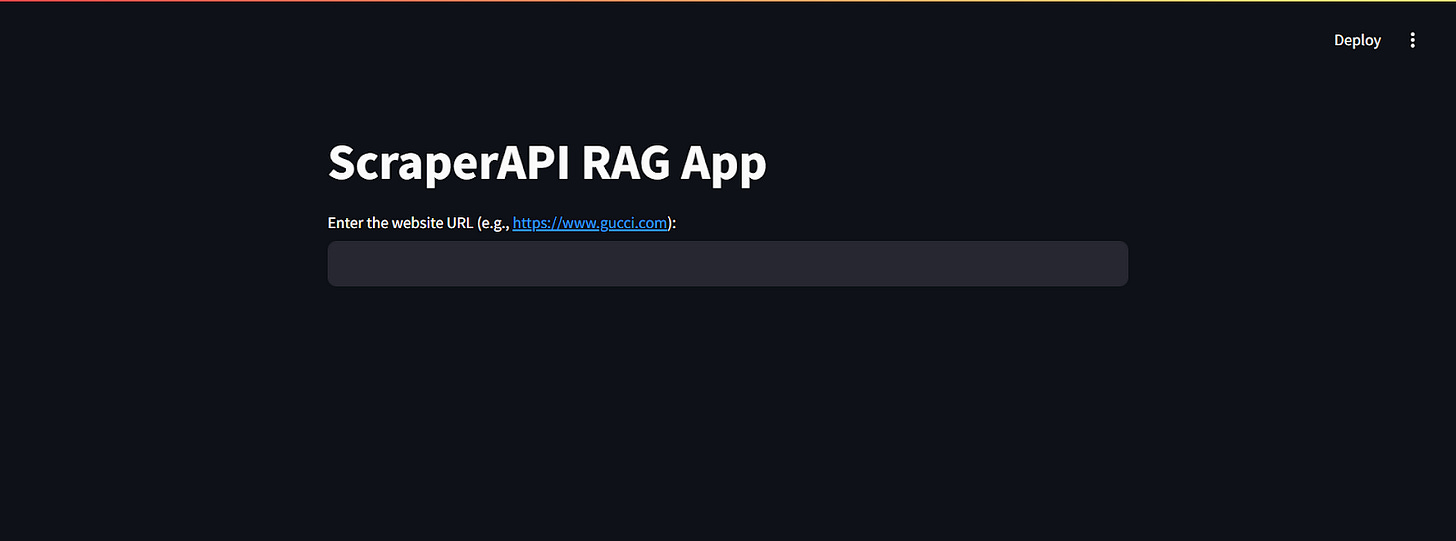
Here is what the tool’s UI looks like:
You will find the complete code for this project on GitHub.
Deploying the RAG Application Using Streamlit Free Hosting
Here’s how to deploy the RAG application on Streamlit free cloud hosting in just a few steps:
Step 1: Set Up a GitHub Repository
Streamlit requires your project to be hosted on GitHub.
1. Create a New Repository on GitHub
Create a new repository on GitHub and set it as public.
2. Push Your Code to GitHub
If you haven’t already set up Git and linked your repository, use the following commands in your terminal:
git init
git add .
git commit -m "Initial commit"
git branch -M main
git remote add origin https://github.com/YOUR_USERNAME/RAG-application.git
git push -u origin main
Step 2: Store Your Gemini Token as an Environment Variable
Before deploying your app, you have to securely store your Gemini token within your system as an environment variable to protect it from misuse by others.
1. Set Your Token As an Environment Variable (Locally):
macOS/Linux
export GOOGLE_API_TOKEN="your_token"Windows (PowerShell)
set GOOGLE_API_TOKEN="your_token"Use os.environ to retrieve the token within your script:
import os

GOOGLE_API_TOKEN = os.environ.get("GOOGLE_API_TOKEN")

if GOOGLE_API_TOKEN is None:
    print("Error: Google API token not found in environment variables.")
    # Handle errors
else:
    # Use GOOGLE_API_TOKEN in your Google Developer API calls
    print("Google API token loaded successfully")
Restart your code editor.
Step 3: Create a requirements.txt file
Streamlit needs to know what dependencies your app requires.
1. In your project folder, create a file named requirements.txt.
2. Add the following dependencies:
streamlit
requests
google-generativeai
langchain
sentence-transformers
faiss-cpu
3. Save the file and commit it to GitHub:
git add requirements.txt
git commit -m "Added dependencies"
git push origin main
4. Do the same for the app.py file containing all your code:
git add app.py
git commit -m "Added app script"
git push origin main
Step 3: Deploy on Streamlit Cloud
1. Go to Streamlit Community Cloud.
2. Click “Sign in with GitHub” and authorize Streamlit.
3. Click “Create App.”
4. Select “Deploy a public app from GitHub repo.”
5. In the repository settings, enter:
Repository: YOUR_USERNAME/RAG-application
Branch: main
Main file path: app.py (or whatever your Streamlit script is named)
6. Click “Deploy” and wait for Streamlit to build the app.
Step 4: Get Your Streamlit App URL
After deployment, Streamlit will generate a public URL (e.g., https://your-app-name.streamlit.app). You can now share this link to allow others access to your tool!
Check out this short video demonstrating the RAG application in action.
Conclusion
By integrating ScraperAPI's LLM Output Feature with Gemini, FAISS vector search, and Streamlit, we built a RAG application that can turn any complex website into a simple, interactive bot.
This tool enables anyone to quickly find specific information from large, complex websites using natural language prompts, saving them the time they would otherwise spend manually browsing countless pages.
Ready to build your own?
Try ScraperAPI today and start transforming complex web content into intelligent, conversational experiences!


